Installation of WordPress on cPanel Hosting with Fantastico
If you decided to use the free version of WordPress open-source software for blog and website management, you would need to obtain a suitable hosting for your site. There are thousands of hosting providers nowadays, and usually, it’s possible to install WordPress on any of them.
The two most important requirements are PHP scripting language support and MySQL database support. If you decided to use the free version of WordPress open-source software for blog and website management, you would need to obtain a suitable hosting for your site. There are thousands of hosting providers nowadays, and usually, it’s possible to install WordPress on any of them. The two most important requirements are PHP scripting language support and MySQL database support.
If you haven’t selected your web hosting provider yet, we strongly recommend you select one that’s based on cPanel. This is software installed on the server that allows you to manage all parameters of your hosting account easier and faster, using point and click methods. One of the providers that’s based on cPanel is HostGator, so feel free to get a package for your site if you are about to use WordPress.
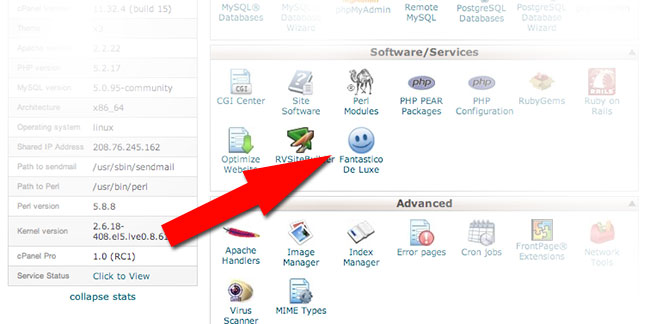
Once you equipped your site with a suitable cPanel-based host, it’s time to install WordPress. There are cPanel versions that come without the Fantastico module, but they are rare. Login to your cPanel and look for the Fantastico icon. If you see it, then you can install WordPress (and many other scripts) within minutes. So, to start, click on the Fantastico (it might be named Fantastico De Luxe as well) icon.
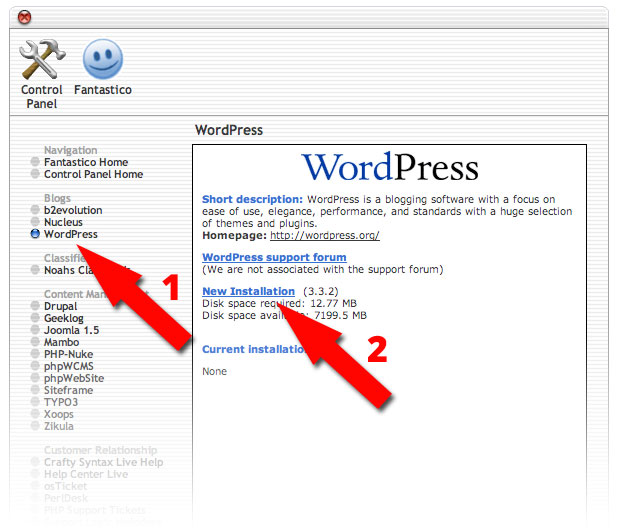
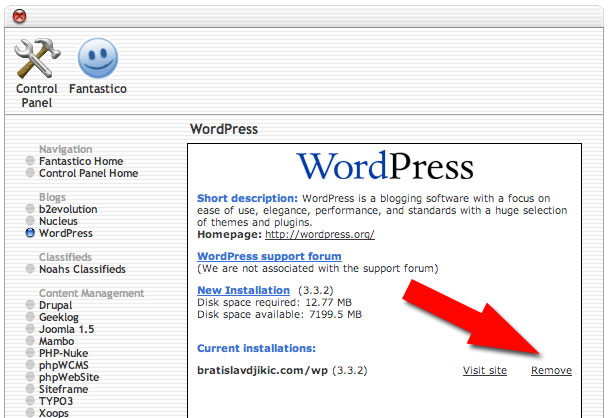
The Fantastico interface will now open, and you will have the list of all supported scripts in the left sidebar. Click on the WordPress link to proceed. You will see a page with some information about WordPress and the link to New Installation. Click this link to start your installation.
The first of the following three pages that will guide you through the installation will appear. Under the Installation location, you should select your domain, then enter the subfolder where to install WordPress (or leave it empty to install it in the root folder). Under Admin access data, you should enter your desired username and password for the master WordPress account (administrator). Finally, under Base configuration, you should enter the administrator’s nickname and email, as well as the site’s title and a short description. To continue, click the Install WordPress button.
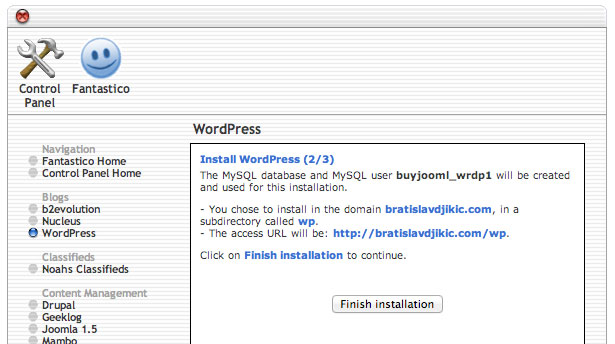
If all went well, the second screen should look at our example. You are almost done! Otherwise, you should read the error message (red-colored), click the Back button in your browser, and correct the errors. To continue, click the Finish Installation button.
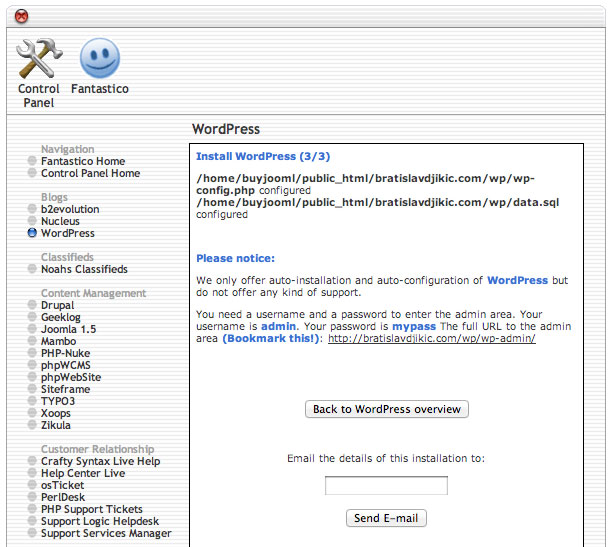
The final screen will give you some information. It shows where on the server you installed WordPress and how you can access the WordPress dashboard. Also, it reminds you of your administrator’s username and password. It’s possible to send an email to yourself as a reminder of this installation and about access parameters. Click on the link that leads to your dashboard (it looks like this “http://www.yoursite.com/yourfolder/wp-admin”) to see your new WordPress control panel. Finally, your new site is ready to be filled with content (your site can be accessed with http://www.yoursite.com/yourfolder”).
We hope these instructions were easy to follow! Good luck with your new site! 😉
If you ever decide to delete this WordPress installation, you can do it through cPanel and Fantastico, with 2-3 clicks. So, log in to your cPanel, click the Fantastico icon and select WordPress from the left sidebar. You will see your installation. Clicking the Remove link and then clicking on the Remove WordPress button will remove this installation and destroy all files and data.