Installation of WordPress on vDeck based hosting
In this tutorial, we will guide you on how to install a clean copy of WordPress on your FatCow, PowWeb, or iPage hosting. This tutorial might be suitable for any other hosting company whose control panel is based on vDeck and has SimpleScripts support.
After you complete this tutorial, you would get a fresh copy of WordPress, ready to fill it up with some content. In this tutorial, we will guide you on how to install a clean copy of WordPress on your FatCow, PowWeb, or iPage hosting. This tutorial might be suitable for any other hosting company whose control panel is based on vDeck and has SimpleScripts support. After you complete this tutorial, you would get a fresh copy of WordPress, ready to fill it up with some content.
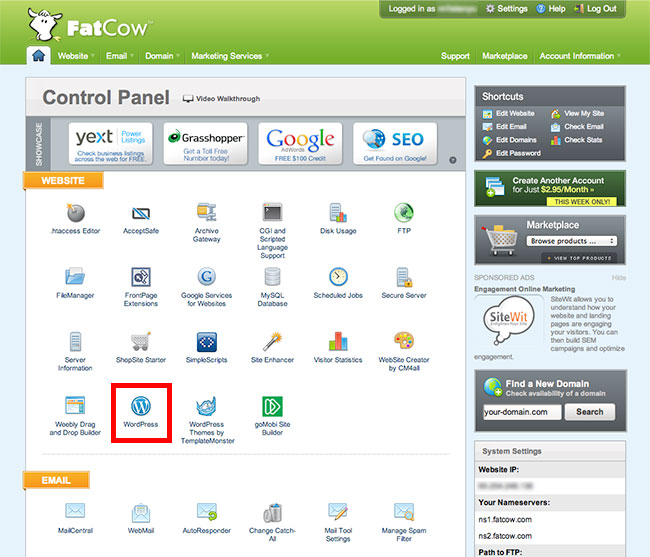
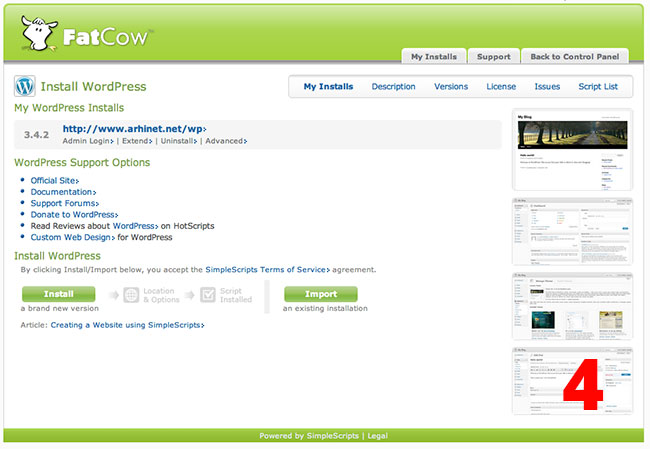
First of all, log in to your hosting control panel. If you don’t know the link or credentials, please check the email that you received from the hosting provider. Once you’re logged in successfully, you’ll see a screen similar to Image 1. On this screen, you should click the WordPress icon to initiate the installation procedure.
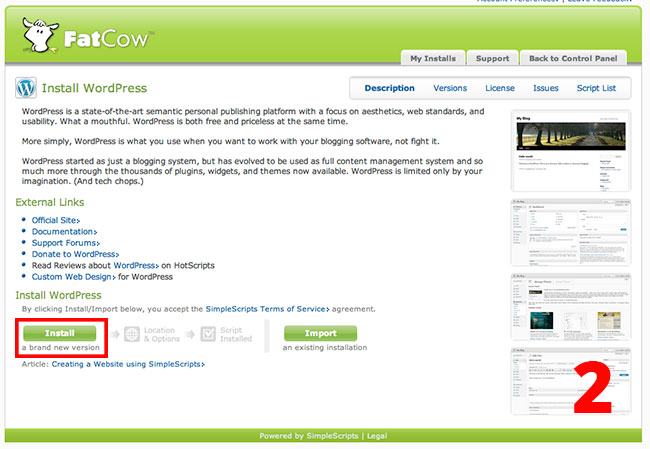
The second screen opens immediately after that. This screen explains what’s WordPress and contains some useful links. There are two options available, starting a brand new installation or importing an existing installation. Click the “Install a brand new version button” to proceed, as it’s shown in Image 2.
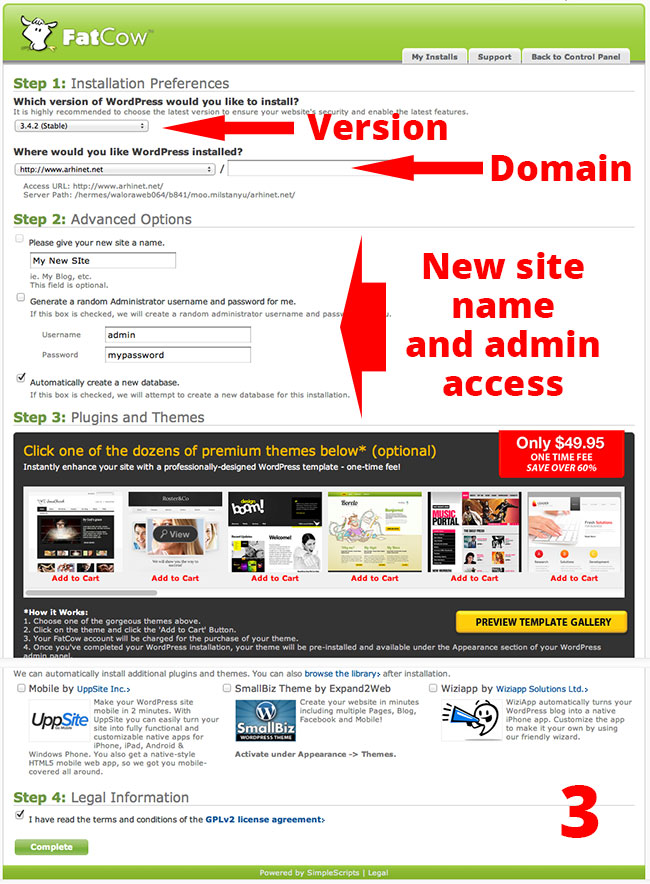
The third screen contains several steps that you should accomplish. In the first step, you should select the version of WordPress that you’d like to install. It’s always recommended to install the most recent versions, which are also automatically selected. Next, you should select a domain associated with your hosting account where the installation would be performed. Also, you can enter a subfolder name or leave it empty to install WordPress in the root folder of your site. The second step is named “Advanced Options” and there you can set your new site name (this will be used for the title tag) and your administrator’s account username and password. We recommend you to leave the “Automatically create a new database” option checked. A new MySQL database for your site will be created and used in this case (check if you have available MySQL databases for your hosting account). The third step is nothing more than advertising, so we recommend you unselect all those offered plugins and themes. You can install desired themes and plugins later after you accomplish the clean installation of WordPress. In step 4, you just confirm that you agree with the GPLv2 license.
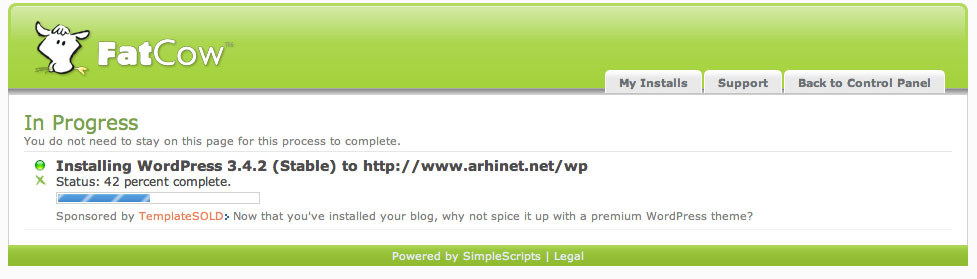
Finally, click the “Complete” button. If the folder where you’re installing contains some data, it’s advised that you backup it first. Otherwise, the installer script may overwrite your files with the new files. A new screen with an installation progress bar will be shown, so you should wait several minutes until it’s completed. When the progress bar reaches 100%, you will see a notice about the successful installation. There will also be displayed the links for your new WordPress site, for the administrator’s panel, and a reminder about your administrator’s access parameters. You’ll also receive an email informing you about all these, so you can save them for later reference.
That’s all folks! You can now proceed with the development of your site. We recommend you consider our themes and plugins that will enhance your new WordPress site and make it look better.
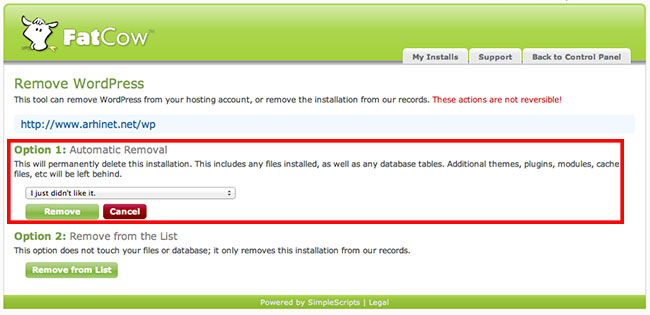
If you ever decide to uninstall this site, from your hosting control panel you should click the WordPress icon again. The list of all installations will be shown, so you can simply click the Uninstall link. Two options will be available. First, uninstall your site and deletes all data! You must select a reason for the uninstallation (you can select anything here). The second option doesn’t uninstall anything. It just removes the information about your installation from the SimpleScripts panel.