How I Moved My Site to InterServer Hosting
As an owner of multiple websites and also in charge of web hosting and maintenance of several clients’ websites, I am in a constant chase for a better web hosting provider. Accessibility and responsiveness of my websites are the top priority. However, price is also an important factor.
A friend of mine recommended InterServer as a solid web hosting provider with servers based on cPanel and optimized for the most popular CMS software. Besides the shared web hosting, they also offer WordPress hosting specially optimized for WordPress users. So, I decided to open an account and try this provider.
Usually, I start testing a new web hosting company by moving my existing website to the new host. This time, I will be moving my old portfolio website based on Joomla to InterServer. Although there are many posts available about website migration (for example, migration from Media Temple) in the Tips section of the InterServer website, I will explain how I moved my website. It can be useful if you decide to move your site as well.
Downloading files and database from a current web host
First, I logged in to my old web hosting provider and downloaded all the files of my Joomla website. Joomla usually contains 8,000+ files. So, if you are downloading them all via FTP, it will take some time. If your current hosting provider allows you to create a ZIP archive of multiple files, it will save a lot of your time. You can simply make an archive of all Joomla files, then download it to your computer as a single file.
Besides the files, each Joomla website also contains a database. You must download a SQL dump of the Joomla database from your current hosting provider. This can be done using phpMyAdmin and almost all hosting accounts provide access to this tool. In case your current provider doesn’t provide access to phpMyAdmin, or you don’t know how to use it, you can ask the hosting support to make a SQL dump and send them to you as a textual SQL file.
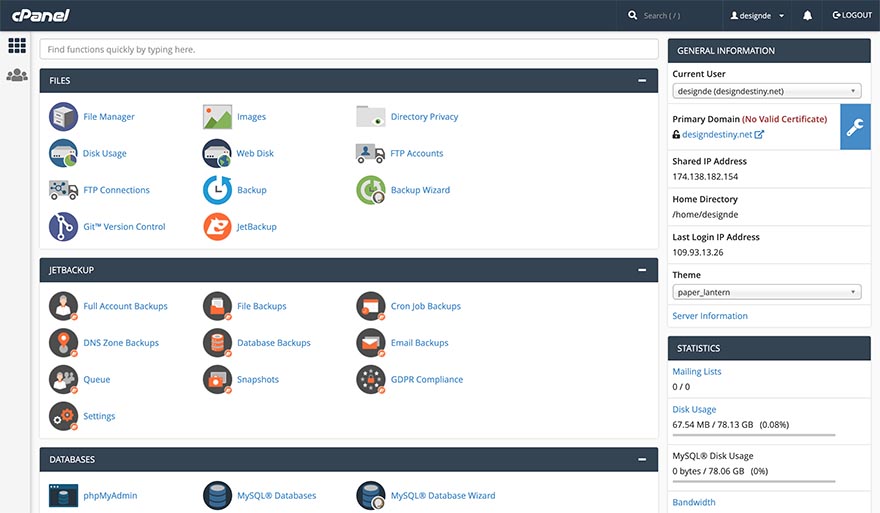
Uploading files and database to InterServer
Now, when you have both files archive and database dump of your site, you can upload them both to your new web hosting provider. In my case, it’s InterServer, so I’ll log in to my cPanel account provided by InterServer. On the first screen, click the File Manager icon to open it. Go to the “public_html” directory and upload the archive of your website files that you downloaded from your current host. When uploading is complete, select the uploaded archive and click the Extract button. Thousands of website files will be unpacked in a matter of seconds and this is a good sign about InterServer’s server speed. Don’t forget to delete the archive after the unpacking of files.
The next step is to upload your website’s database. Since my account on InterServer is new, I need to create a database first. This is done very easily through cPanel. From the cPanel’s welcome screen, click the MySQL Databases icon. Enter the name of your new database and click Create Database button. Now, let’s create a user account that will operate our new database. Under the “Add New User” section, enter a new user name and password and click Create User. Finally, we should assign a new user to the new database. Under the section “Add User To Database”, select your new database and your new user and click Add button. On the next screen, select the “ALL PRIVILEGES” option and click the Make Changes button. Now, your database is ready for uploading data, so let’s do it. Don’t forget to keep the database name, user, and password in a safe place.
From the cPanel’s welcome screen, click the phpMyAdmin icon. Select your new database from the left pane and click the Import tab. Now, choose the SQL file you downloaded from your old web hosting and click Go. Your website data will be imported into the new database. Again, it’s done in a matter of seconds and this confirms the speed of InterServer’s MySQL server. Usually, the responsiveness of the database server is crucial for the performance of your CMS website.
Final configuration
The last step is editing the Joomla configuration file. This can be done through cPanel. You can open File Manager again and, inside the “public_html” directory, select file “configuration.php” and click Edit. Look for these lines:
public $log_path = '/FULL_PATH_TO_JOOMLA/administrator/logs';
public $tmp_path = '/FULL_PATH_TO_JOOMLA/tmp';
Change “/FULL_PATH_TO_JOOMLA/” with the value you can see in the top left corner of the Edit screen. It’s usually “/home/YOUR_ACCOUNT/public_html/”.
The last step is to enter new database credentials. Look for these lines:
public $host = 'YOUR_DB_HOST';
public $user = 'YOUR_DB_USER';
public $password = 'YOUR_DB_PASS';
public $db = 'YOUR_DB';
For the InterServer’s database server, enter “localhost” for YOUR_DB_HOST. Change other values with the database credentials you created previously.
After this step, you are ready to change your domain’s name servers and point your domain to your new web hosting provider.
My experience with InterServer
I ordered a shared web hosting. It’s level Pro because I have multiple websites. After a month of using InterServer hosting, I am very satisfied with the speed of their web servers. The performance of my Joomla site is better than ever. This is good not just for SEO, but for the overall user experience of your customers.
Currently, I am in the process of moving more websites to this host.