Swipe Carousel
The Hot Swipe Carousel is a simple WordPress plugin that creates a widget you can use to add responsive and touch-friendly carousels to your site.
You can create slides and control all options directly in the widget settings. Therefore, you can use and configure your slideshows through WordPress Customizer. Each slide contains an image and optionally text with a heading.
You can create up to 20 slides per slideshow. You can also create multiple instances of the widget throughout your site. It also supports multiple slideshows per page if each widget instance uses a Unique ID. If your slides have text over the images, you can set font size and color. There is also an option that determines pause between slide rotations. There are two ways to navigate through the slides: arrows and dots. You can enable or disable them per your preference.
Images for the carousel should be uploaded via FTP or you can use the images uploaded via Media Library. In the second case, you should know the folder where these images are uploaded. By default, WordPress makes folders with years and months. So, to show images from March 2018, your path will be “wp-content/uploads/2018/03”. There are often several versions of the same image in different resolutions. So, it’s recommended to use FTP to upload your images for the Swipe Carousel plugin and select a folder of your preference.
Swipe Carousel Widget Parameters
To access the plugin’s settings, go to Settings > Hot Swipe Carousel. All widget settings that you can see will be explained here:
Widget Settings
- Uniqie ID – If you want to run multiple module instances on the same page, please enter different ID values here.
- Folder Where Images are Uploaded – Enter URL of the folder with images, an example “http://www.yoursite.com/images/folder” (no quotes, no trailing slash).
- Slides On Screen – If Full Width is selected, only one slide will be shown on screen at once. If Custom Width is selected, multiple slides will be shown on screen at once and you can define slide width and margin below.
- Slide Width – If you selected Custom Width for Slides On Screen parameter, you can enter the width of slides here. Enter value and units, in example 23% or 250px.
- Slide Margin – If you selected Custom Width for Slides On Screen parameter, you can enter margin between slides here. Enter value and units, in example 2% or 20px.
- Text Box Width – Enter text box width in percents (i.e. 50%) or in pixels (i.e. 500px)
- Text Box Horizontal Position – Enter the distance of text box from the left edge of the widget area, in percents (0-100)
- Center Text Box Horizontally – Enable this if you want the text box to be centered horizontally.
- Text Box Vertical Position – Enter the distance of the text box from the top edge of the widget area.
- Text Box Padding – Padding of the top box in percents (0-100). Usually, you can use a value of 0.5, 1 or 2. Higher values could make too much padding which can break the layout.
Widget Style
- Text Box Background Color – Enter background color for text box in RGB format (0,0,0 for black, 255,255,255 for white, etc…)
- Text Box Transparency – Transparency level of the text box (0.0-1.0). Enter 0 for maximum transparency and 1 for no transparency.
- Heading Text Color – Select a color for the headings using the color picker.
- Heading Text Size – Enter headings size, in pixels.
- Text Color – Select a color for the regular text using the color picker.
- Text Size – Enter text size, in pixels.
Navigation
- Navigation Buttons – Enable or disable navigation arrows for the carousel.
- Navigation Dots – Enable or disable navigation dots for the carousel.
Animation Properties
- Pause Between Slides – Enter pause between slides, in milliseconds.
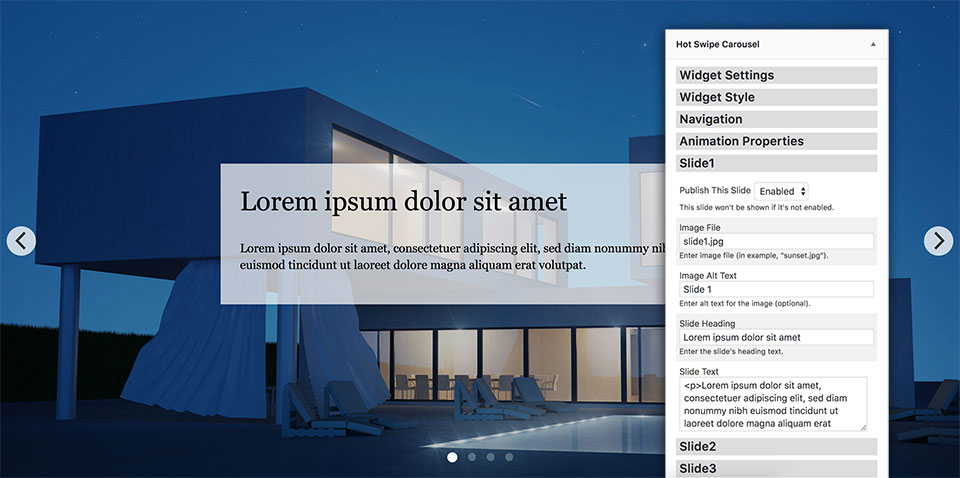
Slide
There are 20 slots marked as Slide 1, Slide 2, etc. where you select an image and enter text for your slides. Each of these slots has these settings:
- Publish This Slide – This slide won’t be shown if it’s not enabled.
- Image File – Enter image file (in example, “sunset.jpg”).
- Image Alt Text – Enter alt text for the image (optional).
- Slide Heading – Enter the slide’s heading text.
- Slide Text – Enter text for the slide as plain text or in HTML format.
Support That Cares
Our products are well-documented, but if you run into the problems with theme installation or usage, simply post your question and our support staff will help.
Always Up To Date
All themes found on this site are tested thoroughly using the latest WordPress version. Any discovered incompatibility issues will be fixed as soon as possible.
Valid HTML and CSS
This plugin is based on clean and valid HTML and CSS code. We tested it using the W3C validation tool to make sure it’s 100% free of errors.
Easier Localization
This plugin is shipped with sets of .mo and .po files that can be used to translate the theme. Also, the theme works with RTL languages.